Troubleshooting Rotisserie Cooking for Fixing Rotisserie Uneven Browning
So, you’re getting into rotisserie cooking but finding that your meat isn’t browning evenly? Been there, done that. Let’s tackle those pesky problems head-on with some tips I’ve picked up.
Fixing Rotisserie Uneven Browning is crucial for achieving that perfect roast.
Why is My Meat Browning Unevenly?
Here are the main reasons your meat might look like a patchwork quilt:
Skipping the Preheat: Not letting your oven or grill preheat can mess up your cooking big time. It’s like trying to bake cookies in a cold oven. Always make sure your grill’s hot before you toss anything on it. (Amana)
Questionable Pans: The type of pan you’re using matters. Dark pans soak up more heat, resulting in darker skins, while shiny ones reflect heat, making bakes a little lighter. Choose wisely. (Amana)
No Foil Love: Not using aluminum foil to protect certain parts of the meat can cause uneven cooking. For example, wings may come out crispy and burnt while the breast meat looks pale. Grab that foil! (Food Republic)
Fix the Rack and Truss That Bird for Fixing Rotisserie Uneven Browning
Sometimes, a small tweak here and there can save your dinner.
Lower It Down: If the bottom of your meat is looking a bit under-browned, dropping your rack a notch or two can help. Shiny and insulated pans? They benefit the most from this. (Amana)
Tie It Up: Trussing your chicken with some kitchen twine can make all the difference. Keeps those legs and wings snug against the body, so they don’t cook faster than the rest. (Food Republic)
Cheats I Swear By
Ungainly bird? No problem. Here are some hacks that have saved my dinner countless times:
- Foil Hats and Capes: Covering parts of the chicken with foil shields them from direct heat. Goodbye, burnt wings!
- Rotate Your Bird: Manual rotisserie? Give that skewer a spin every now and then to even things out.
- Water Pan Magic: Putting a pan of water under your chicken adds some humidity, helping to prevent dry meat.
- Herb Butter Game: Stuffing some herbed butter under the skin can keep your meat moist and add flavor. Double win!
Keep Cooking Fun
Rotisserie cooking isn’t just about getting that perfect golden brown finish—it’s about the joy of cooking. Whether it’s figuring out why your meat looks like a half-baked mistake or dealing with a motor that’s gone AWOL, it’s worth it. If ever faced with problems like rotisserie meat drying out or your rotisserie motor not turning, don’t sweat it. Every mistake is just another lesson towards your culinary greatness.
Happy grilling, and may your meats always turn out juicy and evenly browned!

Making Rotisserie Cooking Better
Alright, you’ve got your rotisserie set up, but sometimes that perfect golden-brown bird ain’t happening. Don’t worry, I’ve got some tricks of the trade to level up your rotisserie game. Especially useful when you end up with a chicken that’s half-browned and half, well, not.
Trussing Tips & Tricks
Trust me, trussing your chicken makes a world of difference. Grab some twine and tie those wings and legs close to the body. This keeps them from cooking too fast and turning into charred bits before the rest of the bird is done (Food Republic).
With everything all snug, the heat spreads evenly. This way, you don’t get that annoying “turn-bump-turn-bump” syndrome where one side gets more toasty than the other (eGullet Forums). But don’t go too tight with the legs. Balance is key!
| Why It Rocks | How It Helps |
|---|---|
| Even Cooking | No overdone wings or legs here. |
| Compact Shape | Heat gets to all the good stuff. |
| Balanced Roasting | Thighs and wings won’t feel left out. |
Drip Pan Magic
A drip pan under your chicken isn’t just for catching mess—it’s a flavor powerhouse. Let those drippings fall, and you’ll not only avoid nasty flare-ups, but you’ll keep the chicken juicy and loaded with flavor. Plus, you can turn those drippings into drool-worthy gravies or sauces.
That pan also collects fat, which helps keep things even. Here’s how to make the most of it:
| Step-by-Step | What To Do |
|---|---|
| 1 | Position the drip pan right under the rotisserie. |
| 2 | Add some water or broth to steam up the flavor. |
| 3 | Baste with the collected drippings for extra yum. |
Tin Foil Savior
Sometimes parts of the chicken cook faster than others. This is where aluminum foil saves the day. Wrap those quickly-browning spots up—like wing tips or leg ends—to stop them from burning to a crisp (Food Republic).
Here’s the game plan:
- Cut foil pieces to cover the problem areas.
- Wrap those parts snugly.
- Keep an eye on things, adjusting as necessary.
With these tips—trussing, drip pans, and foil—you’ll be the rotisserie master in no time. Your chicken will not only look Insta-perfect but taste mouth-wateringly good too. For more on fixing those rotisserie flare-ups, check out my troubleshooting guide.
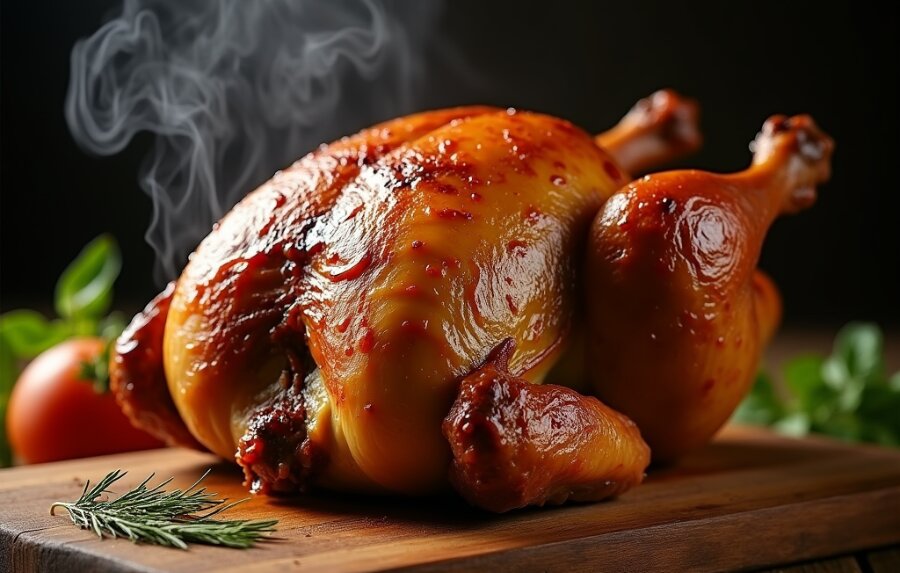
Perfectly Cooked Chicken
There’s something magical about cooking chicken on a rotisserie. The flavors, the juiciness—pure culinary nirvana. But, making sure your bird is cooked just right? That’s the real trick. Here’s how I ace it every time and make shredding a breeze.
Nailing the Temp
First things first, getting that chicken cooked through and safe to eat is non-negotiable. The USDA tells us we need to hit at least 165°F inside the chicken. And before you ask, “Do I have to use a thermometer every single time?”—I’ve got a handy hack. Try wiggling the leg. It should move freely if the chicken is good to go.
Here’s a quick cheat sheet:
| Level of Doneness | Internal Temp (°F) | What It Looks Like |
|---|---|---|
| Safe to Eat | 165 | Juices are clear, leg wiggles |
| Deliciously Juicy | 175-180 | Skin is golden and crispy |
Shredding: No Drama
So you’ve nailed the cooking part, now it’s time to shred. Forget burning your hands and making a greasy mess. This easy trick changes the game.
- Pop your cooked chicken into a big Ziploc bag.
- Get the air out and seal it up tight.
- Gently massage the bag—yep, you read that right—until the meat falls off the bones.
Clean hands and perfect pieces every time. From tacos to salads, shredded chicken has endless possibilities.
Bonus tip? If you ever wrestle with issues like rotisserie flare-ups or dry meat, check out these solutions: flare-ups guide and keeping meat moist. You’ll be a rotisserie master in no time!
Rocking Rotisserie Grilling
Using a rotisserie is a real game changer for anyone who loves grilling. It promises juicy, perfectly-cooked meals but does need some careful attention. Here’s how I make sure my rotisserie cooking always hits the mark.
Getting Your Gas Grill Hot
First things first: preheating. Always start by cranking up the front and rear burners to high heat. Once the grill is sizzling, dial it down or turn off the middle burner. This trick keeps the heat evenly spread around your food, hitting that sweet spot between 275 to 300 °F (135-160 °C).
Here’s a cheat sheet for grill settings:
| Burner Spot | Heat Level |
|---|---|
| Front | High |
| Middle | Off or Low |
| Rear | High |
Want more grilling tips? Check out BBQs Algarve.
Drip Pan 101
Never skip the drip pan—it’s your secret weapon. It catches all those tasty drippings, which you can turn into gravy later. Sometimes I toss in some broth and veggies in the drip pan for added flavor and moisture.
A pro tip: brush on sauces or glazes in the last 15 to 20 minutes of grilling. This keeps them from burning and changing the flavor. Using a drip pan isn’t just about catching drips; it’s also about adding flavors and keeping things juicy.
| Why Use a Drip Pan? | Benefits |
|---|---|
| Catch drippings | Perfect for gravy |
| Add broth and veggies | Boosts flavor |
| Sauce timing | Avoids burning |
More details on this can be found at BBQs Algarve.
Keep the Lid Shut
Keep the lid closed when you’re rotisserie grilling. This traps the heat inside, making sure everything cooks evenly. I’ve learned that a closed lid means perfect heat distribution and no uneven browning.
Cooking over a fire pit? Center your food and surround it with embers. This setup mimics a closed grill, ensuring even cooking just like your rotisserie.
If you’re having trouble with flare-ups or drying out your meat, check out my articles on rotisserie flare-ups and keeping rotisserie meat moist. Follow these tips and get a mouthwatering rotisserie result, every single time.
Rotisserie Chicken Roasting Tips
When I’m making rotisserie chicken, a few good tricks can be game-changers. These tips focus on tying the chicken (trussing), getting the prong right, and some alternate ways to cook, so you get delicious, evenly browned chicken every time.
Trussing Importance
Trussing, or tying up the chicken, is super important. When you truss a chicken, it keeps everything tight and helps cook the bird evenly. If you don’t truss the legs properly, it’s like trying to roast a flapping mess. Here’s why trussing is your best friend:
| Perk | Why It’s Cool |
|---|---|
| Even Cooking | Keeps the heat spreading out nicely. |
| Better Browning | Exposes more surface area for that golden crisp. |
| Controlled Done-ness | Stops some parts from being dry while others are still raw. |
For more about trussing and making sure your chicken browns up perfectly, check out troubleshooting rotisserie flare-ups.
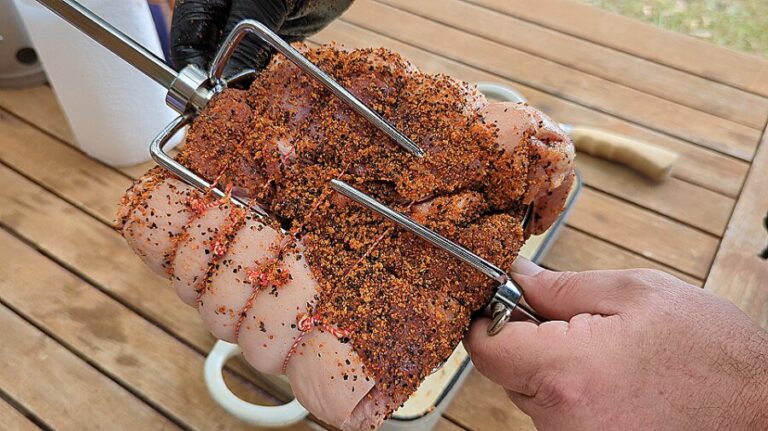
Prong Positioning
Where you stick those prongs matters a lot. I’ve learned that placing the prongs on the outside of the chicken, without poking holes in the meat, helps it turn better and cook evenly. Tight prongs can mess up the rotation and cooking.
Got two chickens? Flip one upside down for better balance. Here’s a quick summary:
| Position | Why It Works |
|---|---|
| Outside the Bird | Keeps everything spinning smoothly. |
| Upside Down Bird | Better spin when cooking two at once. |
If your prongs are giving you trouble, see our guide on rotisserie motor not turning.
Cooking Alternatives
When I feel like changing things up, or if it’s not turning right, I try other methods. A vertical rotisserie or even the beer can chicken trick can give you great results too. This keeps the meat juicy and the skin crunchy, without crappy turning issues.
These methods work well if your horizontal rotisserie isn’t playing nicely. If that’s the case, you might want to look into troubleshooting rotisserie burner problems or get a unit with a direct drive mechanism for steady rotation.
So by trussing right, positioning those prongs smartly, and mixing it up with alternate methods, you can conquer any rotisserie chicken cooking issues and enjoy perfectly roasted birds every time.
Getting Cozy with Your Rotisserie Oven
Cooking with a rotisserie oven isn’t just about twirling a bird on a spit. It’s an adventure in flavor and technique that can turn a simple dinner into a mouth-watering feast. Let’s break down the essentials so you can make the most of every spin.
The Heat’s On
A rotisserie oven works its magic with a mix of radiant and convection heat. Radiant heat gives you that perfect, crispy brown crust, while convection makes sure everything cooks nice and evenly. Check out the usual suspects for heat sources:
| Heat Source | What It Does |
|---|---|
| Gas Infrared Burners | Blasts intense heat fast for crispy skin |
| Electric Quartz Elements | Steady, reliable heating for even cooking |
| Metal Elements | Found in electric models, super consistent |
| Wood or Gas Flames | Adds a smoky, classic touch to your food |
Each type of heat source has its own perks. Choose the right one, and you’re halfway to rotisserie heaven.
Continuous vs. Batch Ovens: The Showdown
Knowing your rotisserie type is like knowing your car’s gears—it changes how you drive. Here’s what you need to know:
| Type | How It Works |
|---|---|
| Continuous | Several spits in a row, vertical layout, quick top-cooking, needs more attention |
| Batch | Uses a rotating drum, evenly cooks all around, faster and simpler |
Continuous ovens can be a bit needy, with constant checks to make sure things aren’t overcooking. Batch ovens, though, are user-friendly and faster.
Size Matters: How Big Should You Go?
Deciding on oven size depends on how often you’re cooking and how much you plan to serve. Tips to keep in mind:
- Estimate your sales and add about 15% for growth.
- Match energy use to your setup—gas or electric.
- Think about how flexible your menu is.
- Figure out labor needs and space for loading and unloading spits.
Gas ovens might need a lot of juice, up to 195,000 Btu/hr., which means good gas pressure is key. Electric ovens can be circuit-hogs, and some models may require plumbing. Don’t forget about proper ventilation—your kitchen (and fire safety) will thank you.
Tips and Tricks
Make sure you know what you’re dealing with so you avoid hiccups like uneven cooking. For extra help, check out our tips on solving rotisserie flare-ups or preventing rotisserie meat from drying out.
Armed with these insights about your rotisserie oven, you’re ready to tackle any cooking challenge that comes your way, enhancing your culinary journey to delicious new heights.