How To Season a Flat Top Grill Basics
Griddle Seasoning 101
Seasoning a flat top grill isn’t just some extra step—it’s essential for a perfect cooking surface that’s clean and ready for action. Think of it like building the base for a masterpiece meal. Getting this right makes for non-stick, flavourful cooking.
Step one: preheat the grill to a medium-low or medium heat. Cranking it up too much can burn the oil, turning a simple task into a sticky nightmare (Little Griddle).
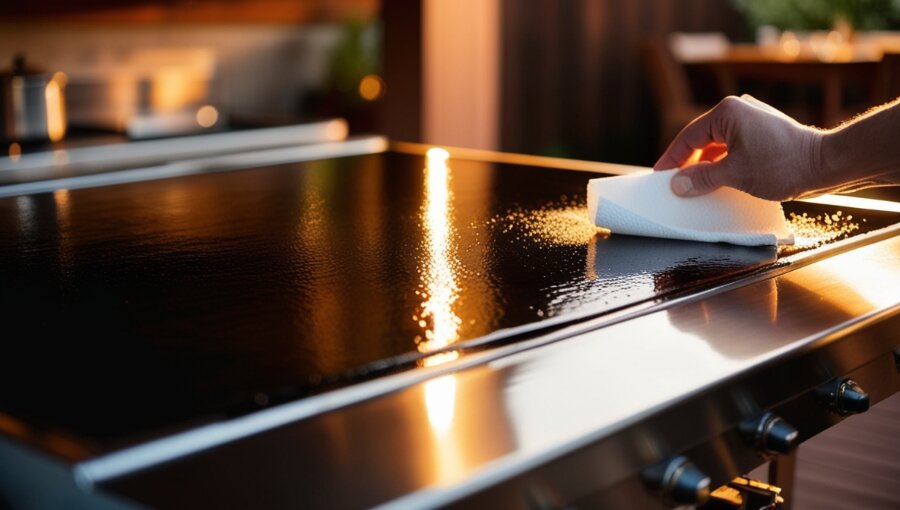
It goes like this: apply a thin layer of oil (vegetable or canola works great) on the grill. This not only lays down the non-stick foundation but also keeps rust at bay. Repeating this a few times—oil, heat, cool—gives a great seasoning layer.
Here’s a quick rundown of the steps involved:
| Step | Description |
|---|---|
| 1 | Scrub the griddle with soap and water. |
| 2 | Make sure it’s bone-dry. |
| 3 | Spread a thin coat of oil evenly. |
| 4 | Warm up the grill to 176-204°C (350-400°F). |
| 5 | Let it cook for about 30 minutes, then let it cool. |
| 6 | Do the oil-and-heat routine a few more times. |
Why Seasoning Matters
Seasoning isn’t just for keeping food from sticking—it’s like giving your flat top grill a protective armor. This layer keeps rust away, boosts flavour, and makes your cooking surface sleek. Good seasoning helps lock in moisture, making your food juicy and delicious every time you fire up the grill.
A well-seasoned grill offers:
- Smooth cooking, preventing food from sticking.
- Even heat distribution across the surface.
- Preserves the flavour of each dish by keeping old flavours from mixing into new ones.
Every time I pull out my spatula, I see that my seasoning job was worth it. A thin layer of oil after each use keeps the seasoning in top shape and maintains that fresh flavour.
Not sure how to clean or maintain your flat top grill? Check out my guide on cleaning a flat top grill and get those seasoning habits dialed in. Proper care means every BBQ session, be it veggies or steaks, is top-notch.
Picking the Perfect Oil
Picking the right oil for your flat top grill isn’t just a chore—it’s the secret to stellar cooking and a grill that lasts. With so many oils out there, I’ve zeroed in on a few that stand out for their high smoke points and awesome benefits.
Top Oils to Use
Flaxseed Oil
This one’s my go-to for seasoning a Blackstone grill. It handles high heat like a champ, making it perfect for creating a durable non-stick surface. If you’re curious about seasoning tricks, check out flat top grilling tips.Avocado Oil
With a smoke point of 500-520 degrees, avocado oil is a winner. It’s versatile, healthy, and has a neutral taste that plays nice with any food you grill.Solid Crisco Shortening
Don’t overlook Crisco shortening. With a 490-degree smoke point, it’s budget-friendly and a breeze to apply, straight from the can.
| Oil Type | Smoke Point °C – (°F) | Perks |
|---|---|---|
| Flaxseed Oil | 232 – (450) | Handles high heat, builds a tough layer |
| Avocado Oil | 260-271 – (500-520) | Healthy, neutral taste |
| Solid Crisco | 254 – (490) | Cheap, super easy to use |
Oils That Can Take the Heat
When seasoning your grill, you need oils that can face the heat without burning up. High smoke point oils are your best bet for effective seasoning and keeping your grill in top shape.
The table gives you the lowdown on my top oils, their smoke points, and why they’re worth it. Always start with a clean grill before you oil it up—trust me, it makes a difference. Need some cleaning hacks? Check out cleaning a flat top grill.
Using the right oil not only makes cooking easier but also keeps your grill in good nick. For some mouth-watering ideas, don’t miss our flat top grill recipes.
Getting Your Flat Top Grill Ready
Before diving into seasoning a flat top grill, you gotta make sure it’s cleaned up and prepped. Let’s get into it.
Cleaning Before Seasoning
First things first—cleanliness is key, right? If you’ve got remnants of last week’s burger night stuck to your grill, it’ll mess with your seasoning. So, grab that scraper or spatula and get to work, scraping off any leftover chunks, gunk, or grease. For those really stubborn spots, you might need some warm, soapy water or a special cleaning solution. Make sure the grill is squeaky clean so the seasoning process sets up just right and your food tastes as great as you dreamed.
Quick cleaning rundown:
- Scrape off gunk.
- Wash with soapy water if needed.
- Rinse and dry thoroughly.
Once the grill’s sparkling clean and dry, you’re set for the heating phase.
Heating for Seasoning
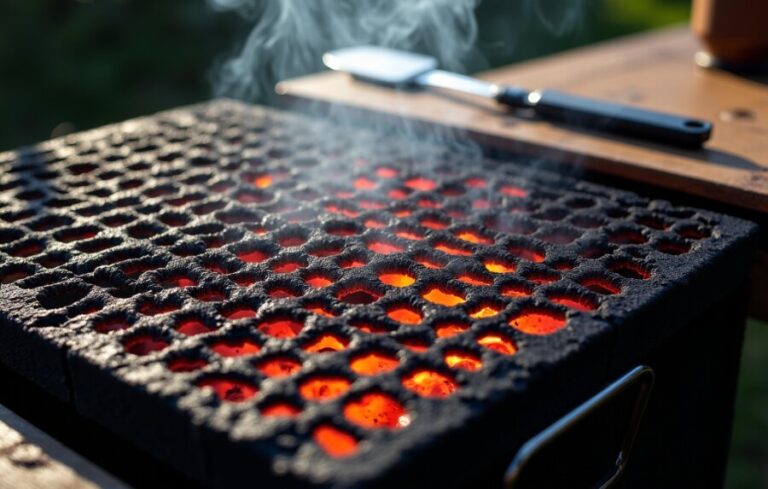
Time to heat things up! Fire up your flat top grill and set it to medium-high for about 15 minutes. This heating bit opens up the metal’s pores, getting it ready to soak up that oil.
When the grill’s hot and ready, slap on a thin layer of cooking oil. Oils like canola or grapeseed work best because they’ve got high smoke points. Use a paper towel or grill brush to spread the oil evenly. Keep it light—nobody likes a greasy, sticky grill.
Crank the heat to high and leave it for another 10 minutes. This is where the magic happens—the oil bakes in, creating a slick, non-stick surface. Now your grill is primed for some cooking action (Grill Masters Club).

Seasoning Techniques
Seasoning your flat-top grill is crucial—it keeps the surface protected and takes your cooking up a notch. Here’s a no-frills guide to seasoning your flat-top grill, plus how to spot when it’s time to do it again.
Step-by-step Seasoning Guide
Clean the Surface: Start by giving your griddle a good scrub with soap and water. Get rid of any leftover food bits or grime. Need more cleaning tips? Check out our guide on cleaning a flat top grill.
Heat the Grill: Turn the grill on high for about 15 minutes. This gets the metal ready to soak up the oil.
Apply Oil: With the grill hot, use a paper towel or brush to spread a thin layer of cooking oil all over the surface. Don’t overdo it—a little oil goes a long way here.
Heat Again: Heat the grill for another 10 minutes. This will set the oil, creating a non-stick layer.
Repeat the Process: Repeat the oil and heating steps three or four times. Each layer builds up a better protective coating.
| Step | Action | Time |
|---|---|---|
| 1 | Clean the grill | Until clear |
| 2 | Preheat grill | 15 minutes |
| 3 | Apply oil | Thin layer |
| 4 | Heat grill | 10 minutes |
| 5 | Repeat | 3-4 times |
Now your grill’s ready for tasty recipes like scrambled eggs or fried rice—with even heat distribution thanks to the seasoning.
Re-seasoning Indicators
How do you know when to re-season? Look out for these telltale signs:
Food Sticking: If food starts sticking more than usual, the non-stick surface is wearing off.
Discoloration: Dark spots mean the seasoning is breaking down and needs a refresh.
Rust Appearance: Rust is a big red flag—time to season again to prevent more damage.
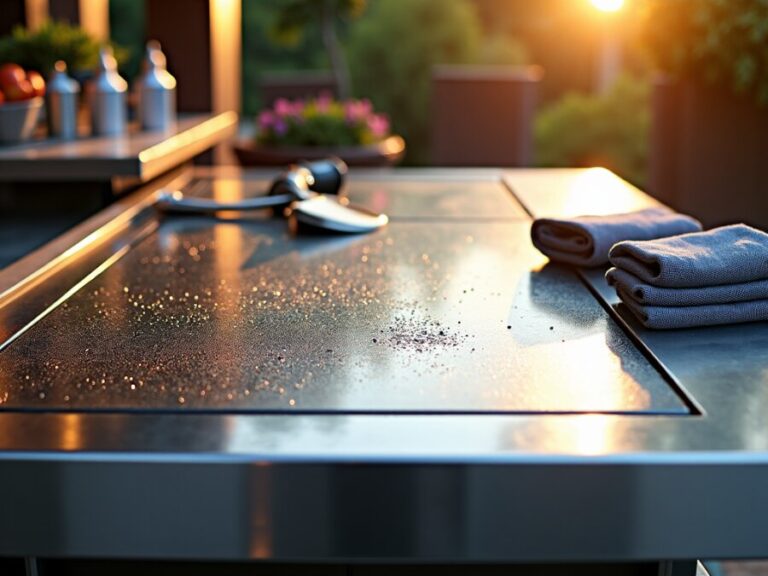
Water Test: Drop a few water droplets on the surface. If they evaporate quickly, your grill isn’t well-seasoned and needs a redo.
Keeping an eye on these signs helps keep your grill in top shape, making your outdoor cooking sessions a breeze. For more tips and tricks, check out our flat top grilling tips.
Keep Your Flat Top Grill in Tip-Top Shape
Owning a flat top grill means you’re serious about cooking some mouth-watering meals. But to keep that magic going, a bit of maintenance is key. Let’s dive into some practical tips to keep your grill in mint condition and ready for the next feast.
Post-Cooking Cleanup
First off, cleaning after every use is non-negotiable. Think of it as a quick scrub to keep your cooking area pristine, just like your kitchen countertop. Here’s my routine:
- Cool Down a Bit: Let the grill cool, but not completely. You want it warm enough for easy cleaning.
- Scrub Off Food Bits: Use a metal spatula or scraper to get rid of food particles. No specialty tools needed, just good ol’ elbow grease.
- Wipe Down: Grab a damp cloth or sponge and give the surface a good wipe. Skip the harsh chemicals; they can mess with the seasoning.
- Oil It Up: Finish with a light coat of oil to keep the seasoning intact and protect the surface from rusting.
This straightforward routine keeps the grill looking pristine and ensures even heat distribution for the next time you fire it up. Plus, nothing’s more satisfying than a spotless grill ready for action.
The Magic of Seasoning
If you want a grill that lasts, seasoning is your best friend. Think of it like adding layers of protection and flavour. Here’s why I’m all about it:
- Bye-Bye Rust: A seasoned grill repels moisture and keeps rust at bay. Clark Kent’s got nothing on this superhero layer.
- Flavour Boost: Over time, seasoning adds those rich, smoky flavours to whatever you cook.
- Easy Cleanup: No one enjoys scrub-down marathons. Seasoning helps keep food from sticking, making cleanup a breeze.
I usually re-season my grill every few months. If I notice food sticking, discoloration, or rust spots, that’s my cue. After every clean, a light coat of high-heat oil ensures I’m always ready to grill like a pro.
Ready for Action
Following these easy maintenance steps guarantees your flat top grill is always game for another round. Imagine the sizzle of cooking everything from breakfast pancakes to dinner steaks without a hitch.
For some culinary inspiration, don’t forget to check out my favorite flat top grill recipes. These tips keep your grill working its magic, letting you focus on creating mouthwatering dishes. Happy grilling!
Taking Care of Your Flat Top Grill
Keeping my flat top grill in great shape isn’t just about seasoning it right. I’ve got to deal with any hiccups and think about how and where I use it.
Fixing Seasoning Problems
Sometimes, the grill’s seasoning—which keeps food from sticking and prevents rust—can act up. If I notice food sticking, funky colors, or rust, it’s probably time to re-season. Not sure? Sprinkle some water on the surface. If it evaporates instantly, it’s go-time for re-seasoning.
Re-seasoning takes about an hour. I start by cleaning the griddle with soap and water, then drying it thoroughly. Next, I apply a thin coat of oil, heat it until it smokes, and repeat this a few times. This creates a solid, non-stick layer. Keeping an eye on how well food cooks can clue me in if a little extra care is needed.
| Problem | Sign | Fix |
|---|---|---|
| Food sticking | Food sticking to grill | Re-season the griddle |
| Discoloration | Dark or uneven patches | Clean and reapply seasoning |
| Rust | Rust spots | Clean thoroughly and re-season |
Indoors vs. Outdoors
Using my flat top grill inside or outside has its perks and challenges. Outdoors, I need to protect it from rain to avoid rust and damage to the seasoning. Covering the grill when it’s not in use helps a ton.
Indoors, I can grill any time, but I’ve got to ensure there’s good ventilation to handle the smoke and heat. Also, protecting countertops or tables from the high heat is key.
Depending on where I use my grill, care routines might change. Indoors might mean more frequent cleaning due to regular use, while outdoors could mean more re-seasoning to combat the elements.
For more tips on maintenance, check out our guide on cleaning a flat top grill. Curious about the differences between flat top and traditional grilling? Head over to flat top grill vs regular grill. Happy grilling!

2 Comments
Comments are closed.