Mastering Reverse Sear Steak
What’s the Reverse Sear Method?
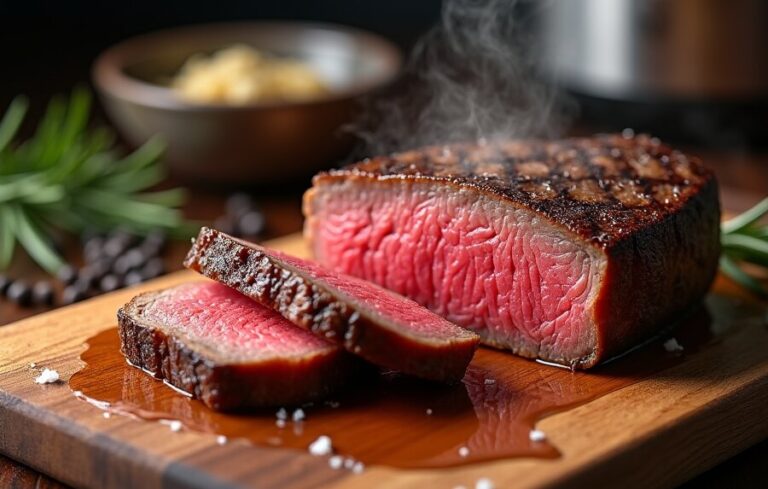
I’ve gotta tell ya, the reverse sear steak method has changed my cooking game. It’s not complicated. You start by slow-cooking the steak in the oven at low temps, then you hit it with a blazing hot sear at the end. Result? You get a medium-rare steak with a crispy crust that’s out of this world. The magic here is cooking the meat evenly using gentle heat. This way, you get juicier results and better browning, as the slow process dries out the surface just right for that final sear moment (Serious Eats).
And there’s this neat science bit—while the meat gently heats up, enzymes break down some of the muscle tissue, making it tender. This method keeps all those tasty juices sealed in, so every bite is a flavor bomb. The outside? Perfectly crispy. Inside? Juicy deliciousness.
Why Bother with Reverse Searing?
You might be wondering, why go through the hassle? Trust me, it’s worth it. Here’s why:
- Even Cooking: The steak cooks uniformly from edge to center, thanks to the gentle heat.
- Better Browning: Drying out the surface ensures a superior crust.
- Tender Meat: Slow cooking helps tenderize the steak.
- Flavor Explosion: Keeps the juices in, so each bite is bursting with flavor.
Here’s a handy chart that spells it out:
| Advantage | Why It Rocks |
|---|---|
| Even Cooking | Uniform heat makes the steak perfect all over. |
| Killer Browning | Dry surface = epic crust. |
| Super Tender | Slow heat breaks down tissues for tenderness. |
| Flavor Packed | Juices stay put, making each bite delicious. |
I’m telling you, since I started reverse searing, my steaks have been rivaling those from fancy steakhouses. If you’re ready to up your steak game, check out how to reverse sear a steak or dive into my reverse sear steak recipe. Feeling adventurous? Explore variations like reverse sear sous vide and reverse sear cast iron for even more fun in the kitchen.
Grab your steaks and let’s get cooking!
Best Cuts for The Reverse Sear Steak Method
Grilling a steak is an art, and choosing the right cut for reverse searing makes all the difference. This method involves cooking the steak low and slow in the oven, then finishing it off with a quick, high-heat sear. If you’re aiming for that melt-in-your-mouth, steakhouse-quality bite, here’s what you need to know.
Ideal Thickness for Steaks
Thicker steaks are your best bet. Ideally, look for cuts between 1½ to 2 inches thick. This gives you a sweet spot to work with, allowing the steak to cook evenly and develop a deep flavor.
| Thickness | Cooking Benefits |
|---|---|
| 1½ inches | Gives you enough room for even temperature throughout. |
| 2 inches | Perfect for achieving that crispy crust without overcooking the inside. |
| 2½+ inches | Best for seasoned pros, requiring careful attention. |
Stick within this range to get that consistent medium-rare doneness with a delightful, smoky flavor.
Best Steak Cuts for Reverse Searing
Certain cuts are absolute rock stars when it comes to reverse searing:
- Ribeye: This one’s marbled to perfection, bringing in rich flavor and tenderness.
- New York Strip: A great mix of tenderness and flavor, always a crowd-pleaser.
- Porterhouse and T-Bone: These big boys offer both tenderloin and strip steak, making them a double win.
- Filet Mignon: Fancy and tender, this cut nails it when you reverse sear.
- Tomahawk Steak: Long rib bone and full of flavor, this cut makes a statement.
- Tri-Tip: Usually grilled but holds up wonderfully when reverse seared.
These cuts shine because the reverse sear method brings out their natural juices and tenderness.
Sure, you could reverse sear thinner steaks, but why bother? They cook so fast you miss out on the deep, wood-fired flavor. Plus, the thin ones are easy to overcook in a heartbeat. Stick to thick cuts and savor every bite.
For anyone fired up to try reverse searing, picking the right cuts kickstarts your path to steak heaven. Time to light those grills and get sizzling!

Why The Reverse Sear Steak Method Works So Well
The reverse sear steak method isn’t just for show; it’s all about understanding what’s happening to your meat. Grasping the basics can transform your backyard BBQ into a five-star dining experience.
Tenderizing to Perfection
First up, let’s talk tenderization. When I cook steak slowly in the oven at 275°F, those wonderful cathepsin enzymes in the meat kick into gear. These enzymes start breaking down the muscle fibers, making your steak oh-so-tender (Jessica Gavin). Since the steak cooks slow and steady, the heat spreads more evenly, meaning less dry edges and more juicy bites – it’s like steak magic!
| Step | Temperature (°F) | Time (Approx.) |
|---|---|---|
| Oven Baking | 275 | 40-60 minutes |
| Quick Sear | 400+ | 1-2 minutes per side |
Flavor Explosion: Caramelization
Moving on to flavor. As I cook my steak slowly, it loses surface moisture, making it perfect for that sear later on. When I finally give it a quick blast of high heat, I get that beautiful brown crust. This browning isn’t just for looks; it’s all about flavor. Slow cooking keeps the steak from drying out, ensuring each cut is perfectly pink and juicy inside while boasting a delicious crust on the outside. No more playing the risky game of burning the outside while the inside stays raw (Serious Eats).
By taking it slow, I can get a gorgeous, even color and amazing texture. This method also puts me in the driver’s seat, giving me ultimate control over the steak’s temperature. It’s almost impossible to mess it up, which is a win in my book (Food Republic).
The magic of enzyme activity and the glorious results of caramelization make reverse searing both smart and lip-smacking good. Curious to see it in action? Check out my step-by-step guide on how to reverse sear a steak or try out a mouthwatering reverse sear steak recipe. You’ll never look at steak the same way again.
Reverse Sear Steak Method vs Traditional Methods
Ah, the elusive art of cooking the perfect steak! Through years of experimentation and a few burnt edges, I stumbled upon the reverse sear method, and let me tell you, it’s a game-changer.
Benefits of Slow Cooking
Goodbye, dry and tough steaks! The reverse sear steak method, akin to a slow dance, lets the meat cook over a longer period, breaking down those tough fibers and unlocking next-level tenderness. The gradual heating process is the secret sauce that gives you that perfect, even color and flavor punch from the caramelization. With slow cooking, you pretty much wipe out the dreaded overcooking—you know, when your medium-rare dreams turn into well-done nightmares. Each bite? Juicy and spot-on to your taste buds (GrillNation BBQ).
| Perks | Reverse Sear | Traditional Methods |
|---|---|---|
| Cooking Speed | Slow and steady | Fast and furious |
| Tenderness | Soft and buttery | Hit or miss |
| Overcooking Risk | Low | High |
| Flavor Development | Caramelized goodness | Meh |
Achieving Precise Doneness
Enter precision cooking! The reverse sear steak method gives you a wider window to nail that golden temperature, meaning you hit your desired doneness every time. Want your steak cooked to a beautiful medium-rare 130°F? Start it away from the heat until it hits around 120°F, then sear it hot and fast. This way, you know exactly where you stand with the temperature, dodging overcooking like a pro quarterback avoiding a sack.
Reverse sear steak method is a dream come true for thick steaks, ensuring that the outer edges aren’t a charred mess while the inside stays raw. It offers the edge in flexibility and cuts down on food wastage—because nobody wants to throw away an expensive chunk of meat due to a cooking slip-up.
By embracing the reverse sear steak method, I’ve unlocked ultra-consistent steak magic, bursting with juice and flavor. Want to master this art? Check out my step-by-step guide to reverse searing a steak or dive into my favorite reverse sear steak recipe and turn your kitchen into a steakhouse.
Techniques for The Reverse Sear Steak Method
Reverse searing a steak is a game-changer, y’all. Here’s how I do it with two simple steps: the oven-bake and the sear. Remember, these steps are crucial for getting that steakhouse-quality crust and ultra-juicy middle.
Oven-Baking Process
Starting with the oven because it sets you up right. Here’s how I roll:
- Heat your oven to somewhere between 225°F and 275°F.
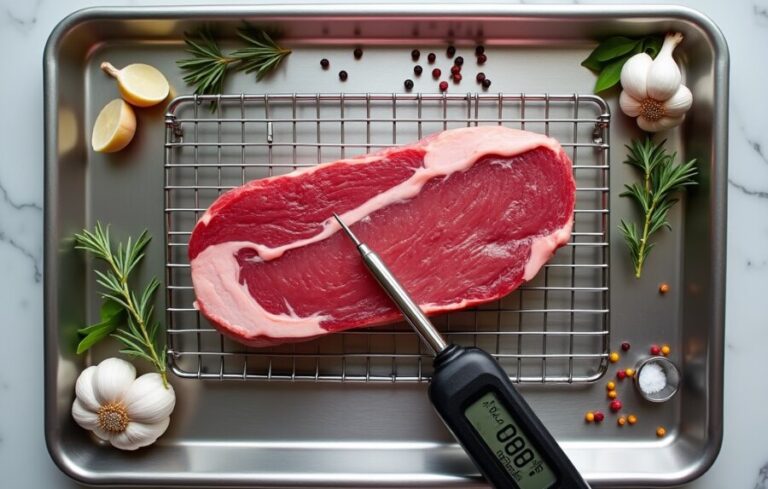
- Season the steak with salt, pepper, and any other spices you dig. Let it sit at room temperature for about half an hour.
- Arrange the steak on a wire rack inside a baking sheet. This way, the hot air reaches the meat from all sides.
- Bake the steak until the internal temp is about 10 to 15 degrees shy of your goal (say, 120°F for medium-rare).
- Pull it out and let it chill while we fire up the grill or pan.
This method makes sure the meat stays juicy and gets that perfect medium-rare texture.
Searing on Grill or Pan
Now, let’s get that awesome crust.
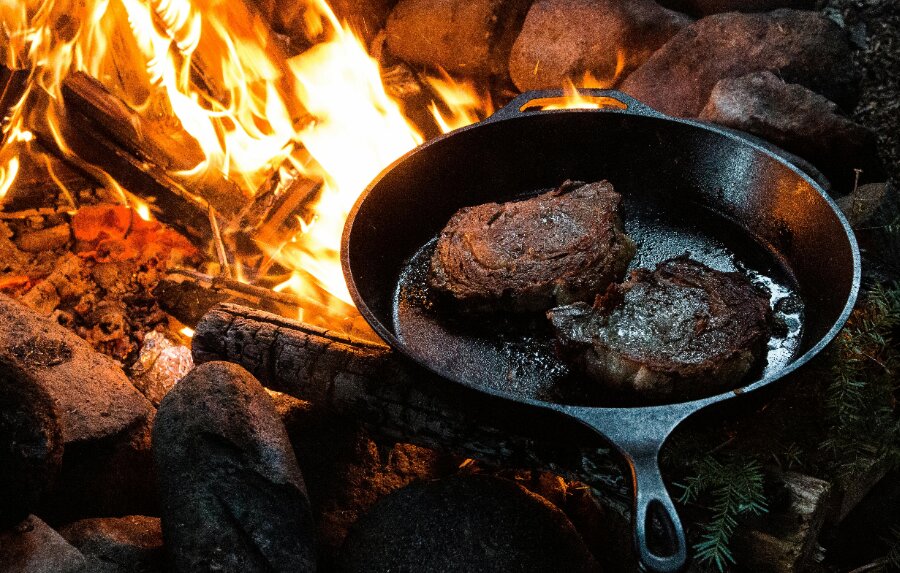
- Crank up the heat on your skillet or grill until it’s blazing hot.
- For pans, I like to drop in a bit of oil to keep things from sticking and help the browning.
- Sear the steak for a minute or two on each side—flip it to get a nice crust and keep those juices locked in.
- You can toss in some butter, garlic, or herbs if that’s your vibe. Adds some rockin’ flavor.
- After searing, let it rest again for a few minutes before slicing. This lets the juices redistribute and keeps your steak tender.
Here’s a quick rundown:
| Step | Oven-Baking | Searing |
|---|---|---|
| Temperature | 225°F to 275°F | High heat |
| Duration | Until 10-15°F below target | 1-2 minutes per side |
| Method | Low, indirect heat | Direct high heat |
| Final Result | Juicy, evenly cooked | Crispy, flavorful crust |
With these steps, you’ll be turning out steaks that even a fancy steakhouse would be jealous of. If you’re curious and wanna get more into the nitty-gritty, check out our detailed guide on reverse searing. Looking for a killer recipe? We’ve got you covered with our reverse sear steak recipe. Enjoy, and happy grilling!
Tips for Perfect Reverse Sear
Getting that ultimate steak using the reverse sear method is super satisfying. Follow these tips to guarantee your steaks come out exactly how you want.
Monitoring Internal Temperature
If you want a steak cooked to medium-rare, you need to aim for an internal temperature of 130°F. Grill those thick steak cuts away from the hot coals until they hit 120°F inside, then give them a direct sear over the blazing embers.
A good thermometer is your best friend here. A quick-read thermometer is perfect for keeping tabs on the temperature, making sure your steak isn’t undercooked or charred beyond recognition. The trick is to cook the steaks gently with indirect heat first, then sear over hot coals to get that delicious crust. This way, you get a consistently medium-rare steak with a nice, crispy exterior.
| Doneness Level | Internal Temperature (°F) |
|---|---|
| Rare | 120 – 125 |
| Medium-Rare | 130 – 135 |
| Medium | 140 – 145 |
| Medium-Well | 150 – 155 |
| Well-Done | 160+ |
Resting Period and Slicing Techniques
After the sear, let your steak rest. This keeps the juices locked in, making it flavorful and juicy. A quick pan-fry can get you a nice crust but often leaves the inside lacking depth. The reverse sear method, however, lets you slowly build flavor and tenderness while maintaining perfect temperature control so you don’t end up with an overcooked disaster.
One huge perk of reverse searing is that it reduces the chance of messing up good cuts of meat. It ensures every steak, no matter its thickness or how you like it, turns out perfect, cutting down on food waste (GrillNation BBQ).
Once the steak has rested, slice it against the grain to keep it tender. This little trick not only makes it easier to chew but also distributes flavors better.