Our evaluations and product assessments are conducted using a thorough and unbiased approach. Should you choose to buy any items through our provided links, we might receive a commission Read our disclosures.
While bottling has been the traditional method for packaging home brew beer, kegging offers several advantages. It’s faster, more convenient, and provides better control over carbonation. In this article, we’ll delve into the world of Home Brew Kegging & Bottling, exploring the equipment required and providing a step-by-step process.

Why Keg Your Homebrew?
- Efficiency: Kegging is easier than bottling in almost every way. Instead of cleaning and sanitising multiple bottles, you only deal with one keg.
- Faster Carbonation: Carbonating beer in a keg is quicker than waiting for individual bottles to carbonate.
- Custom Pouring: With a keg, you can pour as much or as little beer as you want, without worrying about resealing bottles.
- Longevity: Properly stored kegged beer can last as long as an unopened bottle of beer, if not longer.
Equipment Needed for Kegging
Most kegging systems include the following essential gear:
- Kegs: One or more kegs to hold your beer.
- CO2 Bottle and Regulator: To carbonate the beer.
- Beer Tap or Beer Gun: For dispensing the beer.
- Gas Hose: Connects the regulator to the keg.
- Beer Hose: Connects the keg to the tap or beer gun.
- Fittings: Connect hoses to the keg.
- Fridge or Kegerator: To keep the beer cool.
Example Kegging Setups
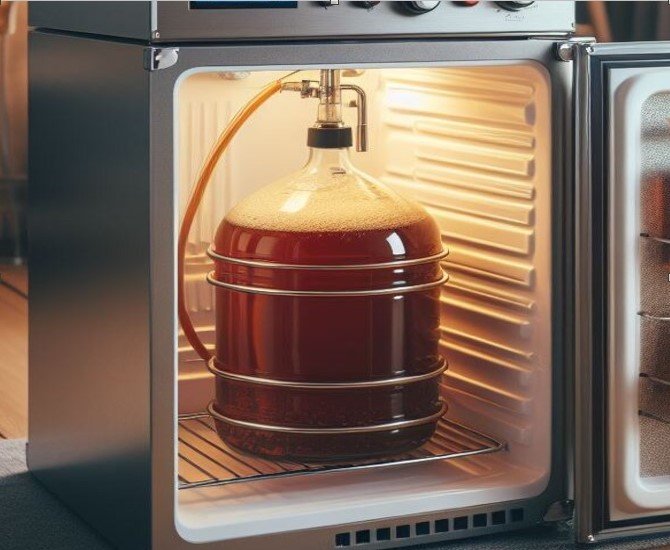
- Fridge-Based Setup: If you have a spare fridge, you can set up your kegs inside. Choose a tap or a beer gun for dispensing.
- Kegerator: A purpose-built kegerator with taps included simplifies the process. It’s visually appealing and fairly easy to set up.
Step-by-Step Kegging Process
- Disassemble the Keg: Take apart the keg components carefully.
- Clean and Sanitise: Thoroughly clean and sanitise the keg and all related parts.
- Purge Air: Use CO2 to remove as much air as possible from the keg.
- Transfer Beer: Rack your fully fermented beer into the sanitised keg.
- Seal and Pressurise: Seal the keg and pressurise it with CO2.
- Refrigerate: Store the keg in a cool place to allow the beer to mature.
- Enjoy: Attach a tap or beer gun, pour, and savour your homebrewed beer.
Things I Like about Kegging Homebrew
- Time-Saving: Kegging is significantly faster than bottling. Cleaning and sanitizing a keg is easier than dealing with individual bottles. Plus, force carbonating beer in a keg takes only 2-3 days compared to bottle conditioning, which can take longer.
- Consistent Carbonation: Kegs maintain consistent carbonation levels. Unlike bottles, where carbonation can vary due to imperfect sealing or uneven priming sugar distribution, kegs ensure a reliable fizziness.
- Better Taste: Kegged beer often tastes better. The lack of light exposure and consistent carbonation contribute to a fresher flavor profile, especially when compared to other beer styles.
- Easy Dispensing: Kegs allow for convenient dispensing. With a tap or dispenser, you can pour a pint without the hassle of uncapping individual bottles.
- Transportability: Kegs are great for transporting beer to events or sharing with friends. They’re sturdy and can hold a substantial amount of beer, making them ideal for parties or gatherings.
Things I dislike About Kegging Homebrew
- Higher Upfront Cost: Kegging requires an initial investment in equipment, including the keg itself, a CO2 tank, and a tap. While reusable, kegs are heavier and more fragile than bottles.
- Storage Space: Kegs take up more space than bottles. Consider where you’ll store the keg and related equipment before committing to kegging.
- Limited Portability: While great for parties, kegs aren’t as portable as individual bottles. If you want to gift your homebrew or participate in beer competitions, bottles might be a better choice.
- Carbonation Control: Achieving precise carbonation levels can be tricky with kegs. Adjusting CO2 pressure and temperature requires some experimentation.
- Maintenance: Regular cleaning and maintenance are essential for kegs. Proper sanitation and upkeep ensure that your beer stays fresh and delicious.
Key Kegging Takeaways
- Kegging simplifies the homebrewing process and offers benefits over bottling.
- Essential kegging equipment includes kegs, CO2, taps, hoses, and fittings.
- Proper timing (after fermentation) and cleanliness are crucial for successful kegging.
- Follow the step-by-step process diligently to enjoy your kegged beer.

Now, Let’s talk about Home Brew Bottling
Before we delve into the step-by-step process, let’s gather the necessary equipment:
1. Bottles
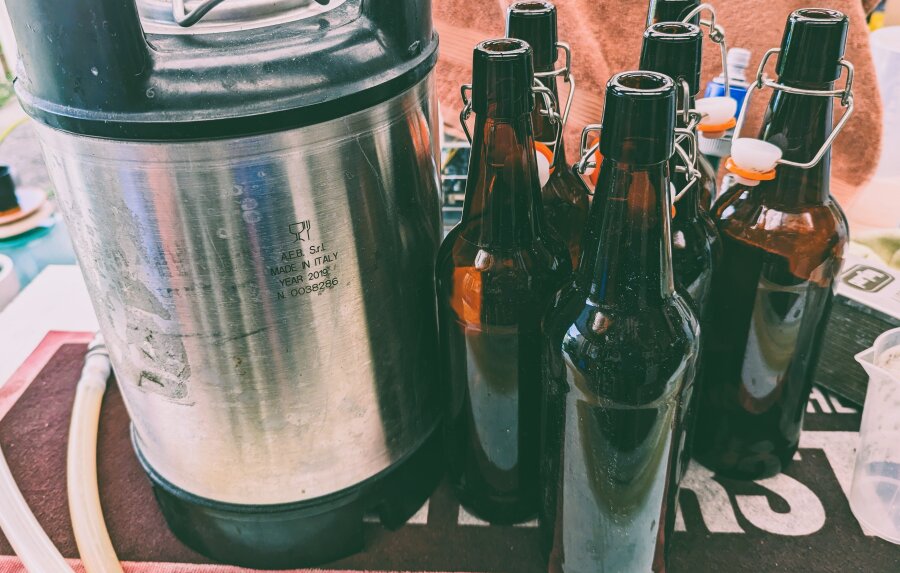
Choose brown bottles (either PET or glass) that block UV light. Skunking, caused by UV exposure, can ruin your beer. Swing-top Grolsch-style bottles or crown cap bottles work well.
2. Cleaning and Sanitising Supplies
- StellarClean PBW: An industry-standard cleaner.
- StellarSan: A no-rinse sanitiser (remember, don’t fear the foam!).
3. Priming Sugar
Carbonation in bottled beer results from secondary fermentation. We’ll add priming sugar to achieve the desired carbonation levels.
Step-by-Step Bottling Process
- Measure the Final Specific Gravity: Ensure your beer has completed fermentation by measuring the specific gravity. It should be stable for a few days.
- Thoroughly Clean Everything: Clean your bottles, bottling bucket, and any other equipment. Rinse bottles immediately after use to make cleaning easier.
- Prepare the Priming Sugar: Calculate the appropriate amount of priming sugar based on your batch size. Dissolve it in a small amount of boiling water and add it to the bottling bucket.
- Siphon the Beer into the Bottling Bucket: Use a hose and bottling wand to transfer the beer gently. Avoid splashing to prevent oxidation.
- Fill the Bottles: Attach the bottling wand to the spigot and fill each bottle, leaving some head space.
- Cap the Bottles with Crown Caps: Use a crown capper to seal the bottles securely.
- Store the Bottles in a Warm Place: Allow the beer to carbonate during secondary fermentation. Keep the bottles at a consistent temperature.
Things I Like about Bottling Homebrew
- Inexpensive: Bottling your beer doesn’t require a hefty investment. You only need basic equipment like a bottling bucket, transfer tubing, bottling wand, bottles, caps, and a bottle capper. Most of these items are relatively cheap, and if you already have a complete beer-making kit, you’re good to go.
- Space-Saving: Once you’ve filled and capped the bottles, they can be neatly stacked in a corner of any room. If you’re brewing in a limited space (like an apartment or condo), bottling is a practical choice.
- Easy to Transport: Bottles make it convenient to share your homebrew with family and friends. They’re great for gifting or taking to special events and parties. Plus, if you plan to enter your beer in a competition, bottled beer with custom labels is the way to go.
- Aging Certain Beer Styles: Belgian ales, Barley Wine, and other strong beers often benefit from aging in a bottle. Letting them sit for months or even years allows flavors to develop more complexity.
- Ideal for Small Batches: If you’re brewing 1 or 2-gallon batches, bottling is the preferred method. You’ll only need to fill about 10 bottles instead of manually capping 48 bottles.
Things I dislike About bottling Homebrew
- Time-Consuming: Bottling takes more time and effort compared to kegging. Cleaning and sanitizing bottles can be labor-intensive.
- Risk of Oxidation: Oxygen exposure during bottling can lead to off-flavors in your beer.
- Carbonation Challenges: Achieving consistent carbonation can be tricky—some bottles may end up under-carbonated, while others over-carbonated.
- Storage Space for Bottles: Storing a large number of bottles can be cumbersome.
- Potential for Bottle Bombs: If you miscalculate priming sugar, bottles may become over-pressurized and explode.
Key Bottling Takeaways
- Cleanliness Is Crucial. Properly cleaned and sanitised bottles prevent contamination.
- Priming Sugar Matters. Accurate priming sugar measurement ensures consistent carbonation.
- Avoid Oxidation. Gentle siphoning and minimal splashing preserve beer quality.
Common Mistakes When Home Brew Kegging and Bottling
Kegging:
- Underestimating Batch Size: Choosing a keg that’s too small can leave you scrambling and adjusting your recipe on the fly. Make sure your kettle accommodates your batch size comfortably.
- Cleaning and Rinsing Keg Lines: After each use, make sure to clean and rinse out your keg lines thoroughly. Neglecting this step can result in funky flavours and potential blockages.
- Over priming in Kegs: Just like with bottles, avoid over priming when kegging. The keg is more forgiving, but excessive pressure can still cause issues. Use an automatic pressure relief valve to regulate PSI.
Bottling:
- Not Properly Sanitising: Sanitation is crucial to prevent contamination from bacteria or other organisms. Failing to sanitise your equipment or ingredients can lead to off-flavours or spoilage. Remember, cleanliness is next to beerliness!
- Lack of a Bottling Wand: Not having a bottling wand can lead to messy bottling and less beer. A bottling wand helps control the flow and minimises oxygen exposure.
- Over carbonating Bottles: When adding priming sugar for carbonation, be precise. Too much sugar can lead to over carbonation, causing bottles to explode like tiny beer grenades. Stick to recommended dosage rates for different types of sugar.
- Leaky Bottles: Improperly sealed bottles may leak CO2 over time. Ensure your crown seals are securely crimped using a bench capper or screw-on plastic caps.
- Secondary Fermentation Sediment: Bottling introduces a secondary fermentation phase. This can create sediment, haze, and esters. Be patient and allow enough time for carbonation without disturbing the settled yeast.
Frequently asked questions on home brew kegging and bottling
Can I use any keg for home brewing? While it’s technically possible, it’s highly recommended to use Corny kegs due to their user-friendliness and easy maintenance.
How long does kegged beer last? Kegged beer can last quite a while if stored properly. Generally, it’s best consumed within 3 to 6 months. Proper cleaning and sanitization of the keg play a crucial role in maintaining beer quality.
Why is my beer flat after kegging? If your beer is flat after kegging, it could be due to insufficient carbonation. Make sure you’ve properly carbonated the beer by following the recommended pressure and temperature settings during carbonation.
How much pressure should I use for carbonating? The ideal carbonation pressure depends on the style of beer and personal preference. However, a common guideline is to set the pressure to 10-12 PSI and adjust based on taste.
How do I clean and maintain my keg? Regular cleaning is crucial. Disassemble the keg, soak parts in a cleaning solution, scrub, rinse thoroughly, and sanitize before use. Also, replace O-rings periodically.
Can I force carbonate my beer? Yes, force carbonation involves setting the desired pressure and shaking the keg to speed up carbonation. However, it’s essential to allow the beer to settle afterward for better clarity.
Home Brew Kegging and Bottling References:
- A Beginner’s Guide To Bottling HomeBrew by Kee Doery, Kegland Home Brewing Supplies.
- Bottling Beer: The Complete Step-by-Step Guide by Homebrewstories.
- How to Make Beer – American Homebrewers Association. by American Homebrewers Association.
- How To Home Brew: A Step By Step Guide To Brewing Beer At Home by KegLand.
- Step-by-Step Guide for Kegging Your Homebrew by Grain and Grape.
- How to Keg Homebrew by Brewing Crafter.
- How to Keg Homebrew in 6 Easy Steps by Brew App.
- How To Keg Your Homebrew by Brew Cabin.

