Amp Up Your Brew with Whirlpool Hopping
What are Whirlpool Hopping Techniques Anyway?
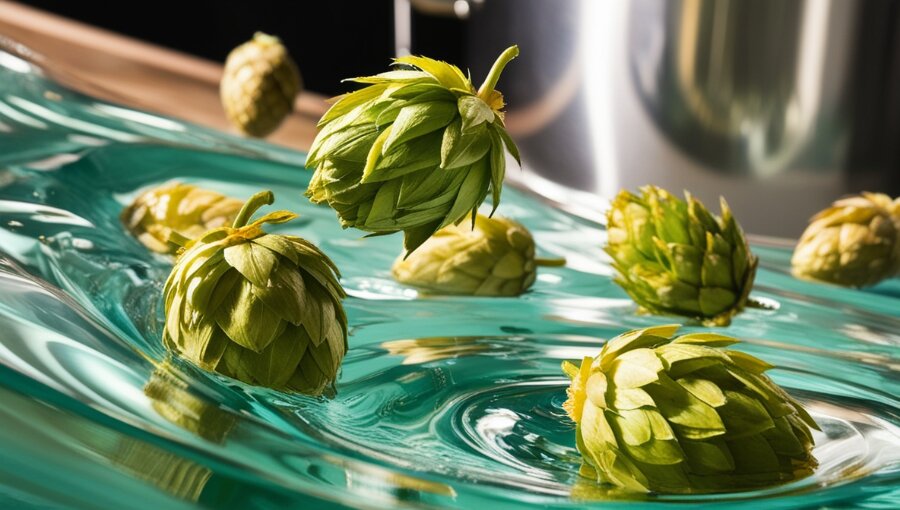
Whirlpool hopping, or hop stand, is a game-changer in homebrewing. This nifty trick involves letting your boiled wort chill with hops before you cool it down for yeast pitching. Usually, this takes about 10 to 30 minutes, but sometimes I push it to 90 minutes for that extra hop kick. By tossing in hops at flameout or when the wort hits around 80ºC (175ºF), I get the best hop flavours without the bitterness overload (Beercraftr).
Why Bother with Whirlpool Hopping Techniques?
Whirlpool hopping isn’t just a fancy term—it’s a flavour booster. Here’s why it rocks:
- Flavour and Aroma Boost: This method pulls out the hop flavours and aromas while keeping the bitterness in check. So, you get a punchy hop taste without the harsh bite.
- Saving Those Precious Oils: Adding hops after the boil while the wort’s still hot helps keep the essential oils intact. These oils are what give your beer its amazing aroma and flavour (Beer and Brewing Magazine).
- Less Bitterness: Since you’re adding hops after the boil, you avoid that overly bitter or veggie taste. Perfect for when you want a smooth, balanced brew.
| Benefit | What It Means |
|---|---|
| Flavour Boost | More hop flavour, less bitterness. |
| Oil Saver | Keeps essential hop oils for better aroma. |
| Smooth Taste | Less bitterness, great for various beer styles. |
Adding whirlpool hopping techniques to my brewing routine has opened up a whole new world of flavours. For more tips and tricks, check out our guides on advanced hopping techniques and maximizing aroma in homebrew.

The Whirlpool Hopping Process
Whirlpool hopping is my secret weapon for boosting the flavour and aroma of my homebrew without making it too bitter. Let me walk you through the technique and some key timing and temperature tips.
Whirlpool Hopping Techniques
Whirlpool hopping, or hop stand, is all about adding hops to your boiled wort and letting them steep in the hot liquid before you cool it down for yeast pitching. This usually takes 10 to 30 minutes, but I sometimes go up to 90 minutes for a more intense hop flavour. The trick is to get all the good stuff from the hops without turning your beer into a bitter mess.
Here’s how you do it:
- Boil the Wort: Start by boiling your wort like you normally would.
- Add Hops at Flameout: Once you turn off the heat, toss in your chosen hops.
- Whirlpool: Stir the wort gently to create a whirlpool. This helps spread the hops around and get the most out of them.
- Steep: Let the hops sit in the hot wort for 10 to 90 minutes, depending on how hoppy you want your beer.
- Chill the Wort: After steeping, cool the wort quickly to get it ready for yeast pitching.
| Step | Description |
|---|---|
| 1 | Boil the wort. |
| 2 | Add hops at flameout. |
| 3 | Create a whirlpool effect. |
| 4 | Steep hops for 10-90 minutes. |
| 5 | Chill the wort. |
This method lets me get the most flavour out of the hops without making my beer too bitter or grassy (Beer and Brewing Magazine).
Timing and Temperature Tips
Timing and temperature are super important for whirlpool hopping. To get the best hop flavours, I suggest adding hops either right at flameout or when the wort cools to around 80ºC (175ºF). This temperature range helps keep those yummy hop oils intact, which give your beer its awesome aroma and flavour.
Here are some key points to remember:
| Factor | Recommendation |
|---|---|
| Temperature for Hop Addition | 80ºC (175ºF) for best flavour extraction |
| Steeping Time | 10-30 minutes for standard; up to 90 minutes for more hop-forward beers |
| Post-Boil Cooling | Chill the wort as quickly as possible after steeping |
By paying attention to these timing and temperature tips, I can make sure my homebrew has the perfect flavour without any unwanted bitterness. For more on hop utilization, check out my article on hop utilization in homebrewing. Happy brewing!
Mixing Up Whirlpool Hopping
Homebrewing has been a wild ride, and playing around with whirlpool hopping has led to some tasty surprises. Two tricks that have really stood out are hop bursting and dry hopping. Let’s break them down and see how they can jazz up your brews.
Hop Bursting: The Flavour Bomb
Hop bursting is a game-changer. Instead of adding hops throughout the boil, you toss them all in at the end. This gives you a smoother bitterness and a punchier hop flavour. To keep the wort from foaming like crazy, I throw in a few hops at the start.
Here’s why hop bursting rocks:
| Benefit | Why It Rocks |
|---|---|
| Smooth Bitterness | Late hops make the flavour smooth and mellow. |
| Big Aroma | Packs a fresh, lively scent into your beer. |
| Flavour Explosion | Mixing different hops at the end creates a rich, complex taste. |
Curious for more? Check out my deep dive on hop bursting in homebrewing.
Dry Hopping: Aroma Overload
Dry hopping is another favorite. You add hops after the boil, once the wort cools down. Usually, this happens when fermentation is almost done. The cool part? Hops add aroma without bitterness since they don’t get boiled (Beercraftr).
Here’s a quick look at hop bursting vs. dry hopping:
| Aspect | Hop Bursting | Dry Hopping |
|---|---|---|
| Timing | End of the boil | After the boil |
| Bitterness | Smooth | None |
| Aroma | Big | Huge, without bitterness |
Both methods bring something special to the table, making your homebrew stand out. For more on dry hopping, check out my article on dry hopping methods.
By mixing up these techniques, you can dial up the aroma and flavour in your brews, making each sip unforgettable. Whether you go for the bold flavours of hop bursting or the intense aroma of dry hopping, your homebrew game will be on point!
Picking the Right Hop Variety
Choosing the right hops is key to getting the best out of whirlpool hopping. Each hop has its own unique mix of oils that add to the flavour and aroma. You need to think about how each hop variety performs in the whirlpool and what kind of flavours you’re aiming for.
Here are some hops that are great for flavour:
| Hop Variety | Flavour Profile |
|---|---|
| Cascade | Citrus, Floral |
| Citra | Tropical Fruit, Citrus |
| Simcoe | Pine, Citrus |
| Mosaic | Berry, Tropical |
| Amarillo | Orange, Floral |
For more options, check out hop varieties for flavor. Experimenting with different hops is part of the fun. Each one brings something different to the table, so tweak your choices based on feedback and your own taste buds.
Keeping a steady temperature during whirlpooling is super important because it affects the hop flavours and aromas. Use a thermometer to keep an eye on the temp, as some kettles can have hot spots.
By using these techniques and picking the right hops, you’ll be able to max out the flavour and aroma in your homebrew. Cheers to better beer!

Tips for Successful Whirlpool Hopping
Whirlpool hopping can take your homebrew to the next level, boosting flavours and aromas. Here are some tips I’ve picked up to make sure your whirlpool hopping is a hit.
Keeping the Temperature Steady
One biggie for whirlpool hopping is keeping the temperature steady. The flavours and aromas you get from the hops depend a lot on the temperature during the whirlpool. Some kettles can have different temps from the bottom to the top of the wort. To keep things even, I use a thermometer to check the top temperature while whirlpooling.
For the best results, I cool the beer to about 170°F (77°C) right after turning off the heat, stir the wort for about 45 to 60 seconds, and then toss in my hops. After adding hops, I let the wort sit for 10 to 20 minutes. You can tweak this based on your own taste, but remember, time and temperature usually work against each other.
| Temperature | Resting Time (minutes) | Notes |
|---|---|---|
| 80°C – 170°F | 10 | Great for most hop types |
| 71°C – 160°F | 15 | Brings out more delicate hop flavours |
| 65°C – 150°F | 20 | Focuses on aroma without adding bitterness |
For more details, check out hop utilization in homebrewing.
Handling Hop Additions
When adding hops during whirlpooling, less is often more. I usually add about one ounce (28 grams) of hops. Adding too many hops can actually reduce the flavour you get, so finding the right balance is key.
Also, I don’t count whirlpool hops in the IBU (International Bitterness Units) budget for most beers. This is because the alpha acids don’t isomerize much at lower temperatures, so whirlpool hops don’t add much bitterness.
Here are some tips for handling hop additions:
| Hop Addition Type | Recommended Amount | Impact on Flavour |
|---|---|---|
| Whirlpool Hops | 1 oz (28g) | Boosts aroma without adding bitterness |
| Dry Hopping | 2-4 oz (56-113g) | Adds strong hop flavour after fermentation |
| Hop Bursting | 1-2 oz (28-56g) | Highlights specific hop traits |
For more info on hop varieties and their flavours, check out hop varieties for flavor. By keeping these tips in mind, you can get the most flavour and aroma out of your homebrew while keeping the brewing process smooth.
Whirlpool Hopping Beyond IPAs
Application in Different Beer Styles
Whirlpool hopping isn’t just for IPAs; it works wonders across various beer styles. I’ve found that this technique boosts the hop character and flavour in brews like pilsners, altbiers, American blondes, and English bitters. By tossing in hops after the boil while the wort’s still hot, I can squeeze out maximum flavour and aroma from the hops (Beer and Brewing).
| Beer Style | Whirlpool Hopping Perks |
|---|---|
| Pilsners | Boosts floral and spicy hop notes |
| Altbiers | Adds depth to malt-forward flavours |
| American Blondes | Brightens the overall hop character |
| English Bitters | Balances malt sweetness with hop aroma |
Each style gets its own unique kick from whirlpool hopping, letting me tweak and perfect my brewing process to match my taste.
Enhancing Flavour Profiles
Whirlpool hopping is a game-changer for getting the most out of your hops. I love how it avoids the overly bitter or vegetal flavours that can come from traditional boiling. The magic of whirlpool hopping is in preserving hop oils, keeping the aromas and flavours lively and fresh (Beer and Brewing Magazine).
By keeping the wort hot during the whirlpool, I can pull out essential oils from the hops without adding too much bitterness. This gives a smoother, more balanced flavour.
If you’re looking to amp up the flavour even more, check out other dry hopping methods. These can work alongside whirlpool hopping for a more complex beer. Picking the right hop varieties can help you craft brews that stand out.
Whether I’m brewing a crisp pilsner or a rich English bitter, whirlpool hopping takes my homebrew to the next level.

4 Comments
Comments are closed.