Our evaluations and product assessments are conducted using a thorough and unbiased approach. Should you choose to buy any items through our provided links, we might receive a commission Read our disclosures.
Common Causes of Cloudy Homebrew Beer
Brewing your own beer at home can be a blast, but sometimes you end up with a murky mess in your glass. Let’s dive into why this happens and what you can do to get that perfect, clear homebrew beer. The two main troublemakers, Suspended yeast and proteins/polyphenols.
Suspended Yeast
First up, yeast. These little guys are basically the life of the party, turning sugar into alcohol. But sometimes, they overstay their welcome. If your yeast isn’t great at flocculating (science talk for clumping together and sinking), they hang around in your beer, making it look like a snow globe (American Homebrewers Association).
Understanding how to resolve these issues is essential for achieving a satisfying homebrew beer cloudy experience.
To kick these freeloaders out, try a few tricks:
- Cold Crashing: Cool your beer down. Yeast hates the cold and will drop out faster.
- Fining Agents: Add these to make yeast clump together and sink to the bottom.
| Yeast Strain | Flocculation Characteristics |
|---|---|
| American Ale | Medium |
| English Ale | High |
| Belgian Ale | Low |
| Lager | Medium to High |
Protein and Polyphenols
Next, we’ve got proteins and polyphenols. These can hook up and create haze, especially when you’re using certain ingredients or brewing methods. Too many proteins in your beer? Time to switch up your recipes.
- Ingredients Matter: Choose pale malts for less protein. Wheat malts are protein-heavy, making your beer cloudy.
- Boiling Tactics: During the boil, proteins coagulate in a process called the hot break. Nailing this can help you get rid of excess proteins.
| Ingredient Type | Impact on Clarity |
|---|---|
| Pale Malts | Lower protein content, clearer beer |
| Wheat Malts | Higher protein content, potential for haziness |
| Specialty Malts | Variable impact, depending on type |
Cloudiness can be annoying, but if you understand how yeast and proteins work, you can take steps to make your brew crystal clear. For more tips and tricks, check out our guides on off-flavors in homebrew and homebrew beer too sweet. Cheers to clearer, tastier beer!
Clearing Up Yeast-Related Haze in Your Homebrew
Homebrewing can be a barrel of fun until you crack open a bottle of your hard work and find it cloudy. Yeast-related haze is often the culprit here, but don’t sweat it. I’m here to share a couple of tried-and-true fixes: cold crashing and fining agents.
Cold Crashing: Keep It Chill
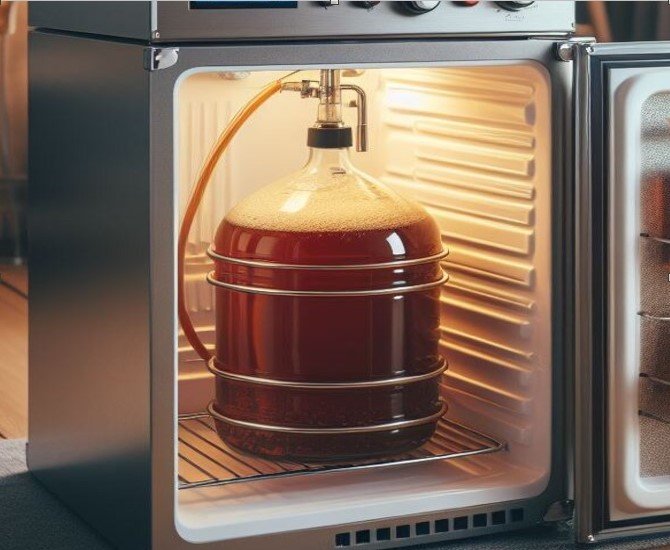
Cold crashing is a go-to move for me when that hazy brew just won’t do. In simple terms, you cool your beer down post-fermentation, making yeast and other bits settle. Clear beer, happy brewer.
Here’s my quick and easy method for cold crashing:
| Steps | What to Do |
|---|---|
| 1. | Once fermentation is a done deal, lower the temperature of your beer to about 32°F (0°C) to 40°F (4°C). |
| 2. | Keep it there for 24 to 72 hours. |
| 3. | After cooling, carefully siphon or bottle the clearer beer, leaving the sediment behind. |
This isn’t just about making your beer look good. It can also up the flavor game by removing unwanted floaters.
Using Fining Agents: Magic in the Mix
When cold crashing doesn’t cut it, fining agents step in like the superhero of the homebrew world. These little helpers grab onto the haze-causing particles and drag ‘em down to the bottom. Goodbye haze, hello clarity.
Popular fining agents include:
| Fining Agent | What It Is |
|---|---|
| Isinglass | Made from fish, great for ales. |
| Gelatin | Animal-based, works in both ales and lagers. |
| Bentonite | A type of clay that zaps out excess proteins. |
Using a fining agent is a breeze. Just dissolve it in warm water and add it to your beer toward the end of fermentation. Pretty soon, you’ll see a clearer, tastier brew.
Still seeing haze? Maybe try these quick fixes too:
- Off-flavors in homebrew
- Homebrew beer flat
- Homebrew beer too sweet
- Infected brew
With these tricks up your sleeve, you’ll clear up that cloudy beer and hopefully end up with a brew you can brag about.

Dealing with Protein and Polyphenol Haze
Cloudy homebrew beer often traces back to protein and polyphenol haze. By tweaking my ingredients and improving the hot break, I’ve seen a big difference in getting that crystal clear brew.
Ingredient Selection
Man, what a revelation! Ingredient choice is key for clear beer. Grains like wheat, oats, and barley can cloud your brew because they’re packed with beta-glucan (Beer Maverick). Here’s my quick rundown of common grains and their haze potential:
| Grain Type | Haze Potential | Comments |
|---|---|---|
| Wheat | High | Protein haze galore |
| Oats | High | Overflowing with beta-glucan |
| Barley | Moderate | Your basic brewing buddy |
| Rye | Moderate | Adds flavor but can hazy things up |
| Corn/Rice | Low | Lightens body, minimal haze |
| Spelt | High | Think wheat but even hazier |
By picking the right grains, I get the taste I want without the murky madness.
Hot Break Improvement
Want clearer beer? Nail the hot break. This stage, when boiling the wort, separates out proteins and polyphenols that cloud beer.
I’ve found that tossing in some Irish moss or a whirlfloc tablet during the boil helps solidify (literally) those proteins, making them easier to separate out. A good wort chiller after the boil rapidly drops the temperature, pushing those pesky haze-formers out of suspension.
Here’s what else has worked for me:
- Boil hard for at least 60 minutes.
- Toss in Irish moss or whirlfloc during the last 15 minutes.
- Use a wort chiller right away for fast cooling.
Focusing on these tweaks, I’ve cleared up my homebrew haze hurdles. If you’re curious about other brewing tips, check out how to dodge off-flavors in homebrew or handle flat homebrew.
Making Your Beer Crystal Clear
Got a cloudy brew that’s cramping your style? Don’t worry, I’ve been there, and I’ve got the lowdown on how to make your homebrew beer as clear as a mountain stream. It’s all about smart filtration and the right clarifying agents. Let me share what I’ve picked up along the way.
Filtration Basics
Filtration’s your buddy when you want that beer to sparkle. It helps yank out the haze and let it settle, making your brew shine—literally! This is super important if you’re looking to impress at competitions or just want your beer looking sharp at your next party.
| Filtration Method | Why It Rocks |
|---|---|
| Physical Filtering | Kicks out big chunks and yeast. |
| Clarifying Agents | Chemically bonds haze-makers together for easy removal. |
Adding a filter to your setup isn’t gonna break the bank—think under $50. Trust me, this small spend works wonders on looks and flavor by zapping haze, proteins, tannins, and that extra yeast (Beer and Brewing). Cloudy beer got you down? Filtration’s your go-to fix.
Using Clarifying Agents
Filtration’s just the start. Toss some clarifying agents in the mix, and you’ll see even more magic. These are like little clarity ninjas, swooping in during bottling or kegging to zap the cloudiness. Here are a few of my go-to agents:
| Clarifying Agent | What It Does |
|---|---|
| Gelatin | Helps proteins and yeast settle at the bottom. |
| Isinglass | Fish bladder magic that clears stuff right up. |
| Polyclar | Synthetic hero for grabbing haze particles. |
Using a fining agent or cold crashing along with these clarifiers can really do wonders (American Homebrewers Association). These tricks make sure your beer not only tastes great but also looks fantastic.
So yeah, with these filtration techniques and clarifying agents in your toolkit, your beer’s gonna be crystal clear, top-notch stuff. No more “Ugh, another cloudy beer” moments. And hey, if you’re still wrestling with some other brewing gremlins, check out our other helpful guides on off-flavors in homebrew, flat homebrew beer, too sweet homebrew, and potential infections.
Cloudy Beer Woes
So, your homebrew suddenly looks more like swamp water than a crisp, clear beverage. Been there, done that. Most of the time, it’s either starch haze or chill haze tripling your frustration. Let’s break it down and straighten things out for you.
Starch Haze
Starch haze pops up when you don’t give your mash enough love, leaving unconverted starch hanging around. It’s usually an all-grain brewer issue but can also happen if you’re steeping grains for extracts. Your mash temperature and duration are just as important as your secret ingredient (which, let’s face it, is probably TLC). Keep an iodine test handy to confirm if everything’s converting properly.
Here’s what you need to keep in mind:
| Factor | Aim For |
|---|---|
| Mash Temperature | 148-156°F |
| Mash Duration | 60-90 minutes |
When my beer looks more like a murky pond, I dig back into my mash process. Simple tweaks can turn a starchy mess into a smooth operation. Trust me, your future self (and your taste buds) will thank you.
Chill Haze
Chill haze is the annoying little sibling of starch haze. It happens when your wort cools down unevenly, letting proteins and tannins cling together like school kids on a field trip. Swirl things up a bit during cooling, and you’ll wave goodbye to that pesky haze. Think of it like mixing a drink – keeping stuff moving helps everything blend better.
Here’s how I dodge chill haze:
| Trick | Tactic |
|---|---|
| Cooling Method | Grab a counterflow chiller or immerse wort chiller for turbo cooling |
| Wort Stirring | Keep the kettle swirling to avoid stagnant pockets |
| Motion Management | Don’t let the wort sit around looking bored near the cooling equipment |
These hacks have turned my murky brews into clear drinks, and trust me, the difference is worth it. Stuck with other problems too? Fixing haze often sets the stage for solving stuff like funky flavors off-flavors in homebrew or that annoying flatness homebrew beer that is flat.
Clear That Brew: Tips to Make Your Beer Shine
So, you’ve jumped into homebrewing, huh? Get ready to say goodbye to the guesswork behind achieving that crystal-clear beer. Two key tricks I’ve swiped from the best: knowing your yeast and nailing your filtration sizes.
Picking the Right Yeast
Yeast is your unsung hero—or the villain—when it comes to beer clarity. Some float around like lazy pool noodles making your beer look like swamp water. Others know how to pack up and settle. If you’re sick of murky brews, you’ve gotta be mindful of what yeast you’re throwing into the pot.
Yeast Choices Matter
I’ve learned that yeast like London Ale III (WY1318) loves to keep things foggy—no matter how many clarifiers you throw at it (American Homebrewers Association, Beer Maverick). Take a look:
| Yeast Strain | Flocculation Level | Usual Result |
|---|---|---|
| London Ale III (WY1318) | Low | Hazy |
| US-05 (American Ale) | High | Clear |
| S-04 (British Ale) | Medium | Semi-Clear |
Pick your yeast wisely and you’ve already won half the battle for that clear glass of joy.
Filtration: The Unsung Hero
Filtration plays a crucial role in how your beer looks and tastes. Yes, clearing up your beer means saying goodbye to those haze particles, but don’t go overboard. You want to retain some of the good stuff—like proteins—to keep that frothy head around. Trust me, you don’t want a beer that’s all head or one that lost its soul (MoreBeer). Here’s a quick cheat sheet:
| Filter Size (Microns) | What It Does | Result |
|---|---|---|
| 1-5 | Removes yeast & proteins | Super clean |
| 6-10 | Keeps some proteins | Balanced clarity/flavor |
| 11-20 | Minimal clarity impact | Slight haze |
Nail these filtration sizes and you’ve got a home run on your hands.
Wrapping Up
So, there you have it. Making your homebrew shine isn’t rocket science—pick the right yeast and filter like a pro. If your beer’s still cloudy, maybe it’s dealing with some off-flavors or infections. It’s another whole can of worms, but worth checking out off-flavors in homebrew and homebrew beer infected.
Make your next brew a clear winner.

